Thursday, March 31, 2011

Takin' Care of Business

Ok, I'm heading to Creative Estates next week.
I am super excited.
It's my first blog/creative conference,
and I'm nervous!
I'm afraid I'll forget something.
Or I'll be shy.
Or I won't have anyone to talk to.

The other thing I'm worried about are business cards.
I have them.
But I want to put a little somethin' extra with them
and I don't know what to do.

After spending the last week making these
for GNO: AZ Style


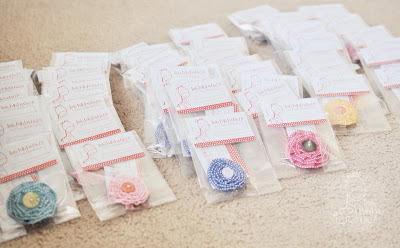
and starting these for my GroopDealz


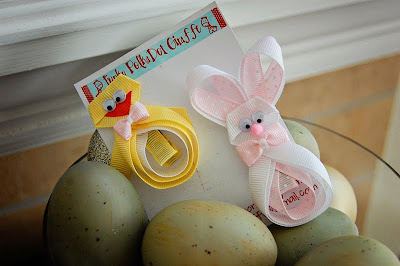
I'm crafted out and out of time!

So what's something fun and easy
I could attach to my business card?
Candy?
Discount code?
lock of my hair?
Creepy?
sorry.

I'd love to hear your ideas and I would REALLY appreciate them.

OH!
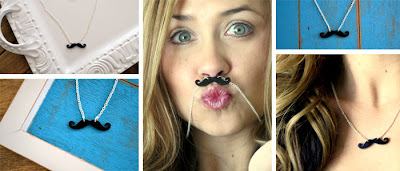
And because I'm obsessed with mustaches :)
I have to share with you the latest GroopDealz!!!

Now you can rock a mustache necklace like I do for a fantastic price!!!
Plus it comes from Little Miss Momma and she's adorable.


This post brought to you by:
Yuri's Design

Wednesday, March 30, 2011

Want It? Win It! Wednesday: Amy Cornwell Designs

*****CLOSED*****


Holla!
So excited to have my March sponsor Amy Cornwell Designs
here to host a giveaway this month!!!

I'm lucky enough to own two pieces of Amy's gorgeous jewelry.

I have my Sweetheart Ring.
Isn't it sweet??


I also have my HOLLA! necklace.
It's a stamped copper necklace and I love it.

Some of my other favorites are:


She also has a fab CLEARANCE section that you have to check out!

Amy is giving away a $25 gift certificate to her fabulous shop!

Do you WANT IT?
Well, you can WIN IT!
If you want to win
then here is what you need to do!

MANDATORY ENTRY
(this MUST be completed for any other extra entries to count)

Leave a comment telling me which item from Amy Cornwell Designs you find most enchanting.

Be sure to leave your email address as well so I can contact you if you win!

Extra Entries:
(You MUST complete the mandatory entry before completing any extra entries.)


1 Extra Entry: {FOLLOW} Amy's Blog. (leave 1 additional comment)
1 Extra Entry: {FOLLOW} Amy on Twitter. (leave 1 additional comment)1 Extra Entry:
1 Extra Entry: {TWEET} about the giveaway with a link back here. (leave 1 additional comment)
3 Extra Entries: {VOTE} for IVORY COAST (Kyla) for my Chunky Bling entry. (leave 3 additional comments)

As always, giveaways are only open to
FPG Google Friends Connect public followers.

This GIVEAWAY will end on Tuesday, April 5th at midnight PST.

1 lucky reader will be selected using Random.org and will have 72 hours to claim the prize or a new winner will be chosen.
The winner's name will be posted in a blog post and at the top of the blog.
You must respond either in a comment or via email.


Tuesday, March 29, 2011

TOO Cute Tuesday: Linky Par-Tay! #24

How is your March finishing up?
This has been a wild month,
but I'm blessed so I can't complain.
(t00 much - LOL)

FIRST,
did you see my GroopDealz???

I just had to give a shout out :)

SECOND,
Did you vote for IVORY COAST?
If you did, thank you!
If you didn't, what are you waiting for???
There's a giveaway in it if I win!
VOTE HERE.
Tell your friends.

THIRD,
this is what I've been working on.

PHEW!
They are for this exciting event that I'm attending in a week!
lil luna button
Are you going??
I'd love to meet you :)

Now onto TOO Cute Tuesday!

What did you make this week that is TOO Cute??
Come link up!

Rules:
  • Must be made by you.
  • Link up to the specific post - not your main blog.
  • No Etsy shops or giveaways please :)
  • Please post the button or link back here so more people can join in the fun.
  • Visit some of the other participants and leave them some LOVE!
TOO Cute Tuesday will be open Tuesday-Friday.
On Saturday I'll highlight some of my favorites
and then we'll start over on Tuesday!


This post brought to you by:
Froggy Girl Designs


Monday, March 28, 2011

GroopDealz: ME!!!!!!!!!!!


Just popping in to say -
Did you see who is the featured deal on GroopDealz today???
It's just me!!!!
I hope you'll pop in and grab one for your niece, neighbor, daughter,
granddaughter, goddaughter - anyone that needs a little Spring happiness!
I know my FPD friends will make me look good :)
GET YOURS HERE!
And if you refer friends to the deal and they buy one - you get credit to use
on future purchases!!!


Marvelous Monday: Eclectic Whatnot


Hey, howdy hey! I'm Ruthanne from Eclectic Whatnot. I blog about um . . . eclectic . . . um, whatnot? Seriously. I'm kinda all over the place. I prefer it that way. No need to box yourself in, right? ::snort::

Let's see . . . a lil' bit about moi:

I homeschool.

I’ve been known to eat chocolate chips straight out of the bag.

I’m a compulsive baker.

I heart old, B&W movies.

I think my husband is sexy.

I also have a crush on Jack Bauer. It’s okay. My husband knows.

My drug of choice is the Caramel Macchiato from Starbucks (Grande, please).

Show tunes make me happy.

I hide behind my Nikon.

I dearly love to laugh.
Today, I want to share a super simple recipe with y'all. If you're not into lemon, then you're probably going to want to look away. My man is a chocoholic and wouldn't eat these if his life depended on it. So, I get it. I also realize that just means there's more for me. I catch on quickly. ::wink::


Lemon Bars
~ Betty Crocker Cookie Book

{1} Pre-heat oven to 350.

{2} Mix together and press into a 8 or 9-inch square pan:

1 C AP flour
1/2 C butter, softened
1/4 C powdered sugar

{3} Bake for 15 to 18 minutes.

{4} Beat with a mixer on high for about three minutes:

1 C granulated sugar
2 tsp. grated lemon peel
2 T lemon juice
1/2 tsp. baking powder
1/4 tsp. salt
2 eggs

{5} Pour mixture over crust and bake for about 20 to 25 minutes.

{6} Cool, cut into squares and sprinkle with powdered sugar.

It's kinda gooey. And it's all kinds of yummy. Enjoy!


Sunday, March 27, 2011

BIG WINNERS! and Sweet Sponsor Lovin'

I hope your weekend has been fabulous.
I realized I am WAY behind on announcing winners!!!
So here they are:

The winner of the darling belt from Hannah Handmade is #18 To Sew With Love!!!

The winner of the super cute headband from Zoelynn & C0. is #2 Shawna!!!

The winner of the $50 GC from CSN Stores is #87 Shel!!!

You lucky winners have 72 HOURS to contact me and claim your prize.


Just a little shout out for my sponsor Eclectic Whatnot.
She has a new line of camera straps called "Thoughts from Behind the Lens".
They are super fantastic.
The colorway is fantastic ;)


She's going to be adding more.
I'd love one that said "I shoot people."
Wahahaha!

AND!!!
She has three of her lovely straps on sale until tonight.
HURRY!


And if you love me - or even if you just like me -
I'm still begging for votes for IVORY COAST.
I'm now behind by 50 votes.
Sad days.
I'd so appreciate 30 seconds for a VOTE.

Enjoy the rest of your weekend and I'll see y'all tomorrow!


Saturday, March 26, 2011

Saturday Shout Outs:{FABULOUS TUTORIAL} Edition

Happy Saturday!!!
The fields are closed and no t-ball game this morning :(
There were so many awesome tutorials,
so I wanted to share some of them with you.

But FIRST!!!
If you are reading this will you PLEASE go and vote for IVORY COAST??

I got within 11 of my competition,
but now I'm down 50!!!!

I know you can help me win!
And if I do, I'll do a RAD giveaway here on the blog.
You can VOTE HERE.


And I'd love you forever if you tweeted or FBed and told your friends to vote too.

{Cardi & Dress Refashion by Domestic Deadline}


{Rainbow Shirt by Sumo's Sweet Stuff}


{Crocheted Earrings by KooKoo Crafts}
These didn't have a tutorial, but I thought they were so cute.


And Me Sew Crazy has TWO fantastic tutorials
{BIG BOW Metal Frame Purse}


Thanks for joining me.
Have a fabulous weekend.
Did you VOTE???
(P.S. You can vote more than once if you have different devices ie phone, iPad, etc)


Friday, March 25, 2011

Funky Friday Feature: The Real Life Mom


Hello fellow Funky PolkaDot Giraffe lovers!
My name is Michelle and I'm stopping by today from The Real Life Mom.

Just a little about me...I'm a mom to one beautiful little girl, wife to a super amazing man, photog and lover of life, chocolate and all things pink!

I just started blogging in September 2010 and I couldn't be more in love! I have had so much fun connecting with others and have been so inspired by all my new bloggy friends.

I thought I'd share with you today a gorgeous DIY shadow box.

My love affair with shadow boxes began a couple of years ago when I created our Wedding Invitation Art piece.


Since then I have been on the hunt for the perfect shadow box to hold my hair piece from our wedding. However, I can only seem to find the very simple ones that have no glam. So I decided when all else fails why not create!

Here's what I came up with.


Isn't she pretty?!?

Supplies needed:

*5x7 frame of your choice. It can be any frame of any design that you like.
(I found this one at Ross).
*Simple Shadow box
(I found mine at JoAnn's.)
*Spray paint in color of your choice
(This is only needed if you do not like the color of your original frame.
This one was originally a shimmery gold. Yikes!)

*4 L-braces
(Can be found at your local hardware store.)
*Screw gun

Simply remove the back of the frame and then spray paint in the color of your choice. Lay the frame face down on your workspace and place the shadow box face down on top (be sure to center it.) Finally, screw the L-Braces in (1 on each side of the frame.) And that's it! You're done! This is a great project that anyone can do. It makes for a great birthday, Christmas or just because gift!

I hope that you've enjoyed and I hope you'll stop by The Real Life Mom and take a look around!

Thank you Kyla for having me today!


Thursday, March 24, 2011

I'm Not Above Begging - PLEASE!!!!!


I'm in a finalist in the contest to name this band over at Chunky Bling.
Will you PLEASE click HERE!!!!!
and vote for
IVORY COAST!
If I win, I'll do an awesome giveaway here on the blog.
GO!
VOTE!
Thanks friends!


Tutorial Thursday: Interchangeable Ruffle Headband

You know which headband I get the most compliments on?
This one.

Strangers stop me and ask where I got it.
Tell me how fantastic it is.
Ask me if I sell them.

I love ruffles and so when I went looking for ideas
for a headband I found several.
Some of my favorites are Smile Like You Mean It,
Gussy, Salty Pineapple, Lu Bird Baby, and Blue Cricket Design.

I actually did make some for a local craft show back in October.
And people loved them.

But most people wanted to know if they were interchangeable.
I said no, but that was a fabulous idea!

So here it is!


You'll need:

  • scrap of fabric
  • 2 pieces of felt
  • headband
  • sewing machine
  • seam ripper
  • glue gun
STEP ONE
Find the center of your fabric.
Set your tension high.
Set your stitch length long.
Sew right down the middle.


It should ruffle your fabric for you.


Woohoo! Pretty ruffle!


STEP TWO
Grab the TOP thread and pull to gather it a little bit more.
Gather and fiddle until it fits your piece of felt.


STEP THREE
Pin the wrong side of your fabric to the felt.
I pin one end first - adjust the ruffle - and pin the other end.


STEP FOUR
Stitch all the way around the piece of felt.
I used about a 1/8" seam allowance.


Now it looks like this!
FRONT


BACK


STEP FIVE
Grab your seam ripper.
And carefully remove the ruffle stitch from the middle.


So it looks like this!


TIP:
If you have itty bitty holes from your ruffle stitch,
lightly spray the fabric with water
and let it air dry.
VOILA!
Teensy holes are gone.


STEP SIX
If you don't want your headband to be interchangeable,
then mark on your headband where you want your ruffle to sit.
I usually put it about 2" front the bottom of the headband.
Then glue the ruffle in place.


If you want your headband to be interchangeable,
then skip STEP SIX and proceed to STEP SEVEN.

STEP SEVEN
Take your headband and use it as a spacing guide.
Lay your second piece of felt on top of ruffled felt
and glue down ONE EDGE of the felt.


STEP EIGHT
Use you headband as a spacing guide again
and glue down the other edge - leaving a tunnel down the middle.
Be careful not to let the glue seep into the middle.
Keep your line of glue pretty close to the edge.
You can also use a pencil, dowel, or pen as the spacing guide
to avoid getting glue on your headband accidentally.


You should have an open little tunnel,
the right size for your headband.


Woohoo!
Now you can slide your little interchangeable ruffle onto your headband.
Isn't it cute??


Then take it off.


Make some more!


And never be without a ruffle again!

I am linking up HERE!!!!

WAIT!!!

ETA: Since you're here :) would you mind clicking HERE

and voting for IVORY COAST???

Fine Print:
Please feel free to use this tutorial for your personal use. Please be kind and give credit where credit is due. Any questions or comments please do not hesitate to contact me.