Showing posts with label Recipe. Show all posts

Friday, August 5, 2011

Funky Friday Feature: ErikaJean.com

Hello there! I'm Erika the author of ErikaJean.com. Today I'm sharing a delicious recipe with all of you. Perhaps you will even give it a try this week! Enjoy!

Crumby Noodles are one of those sides we always begged my mom to make. Now I can make them myself - which means I will probably never be able to get her to make them for me again.

I documented the making of my first batch of Crumby Noodles, so I figured I would share my knowledge with all of you. That's right, I'm going to teach you how to make them! Don't worry - it isn't rocket science and you can't really mess it up. In fact, I'm guesstimating on the measurements... it really depends on how much you're making and how crumby you want your Crumby Noodles.

You will need:
IMG_0620IMG_0615IMG_0617IMG_0619
Egg noodles, salt, garlic salt, butter, bread.

*Fill a pot with water - set it to boil.

While you are waiting for the water to boil...

*Take two slices of bread, and grate with cheese grater.
*Melt about 2 tbs of butter in a frying pan.
*Add a dash of garlic salt and table salt - (about a couple shakes)
*Add bread crumbs. Keep the bread crumbs moving so they don't burn. They should look like this when they are finished.IMG_0608
*Take them out of the pan and set them aside.

You water should be boiling by now. Add your pasta, strain when done.
IMG_0612

*Add a 1 tbs of butter (it really depends on how many noodles you have and how much butter you like) and stir.

*Stir in breadcrumbs....
IMG_0624

*Devour.
IMG_0623

Yep, it's that simple. Unfortunately Crumby noodles don't reheat too well, as the crumbs become soggy.... but don't worry, there won't be any left!

Tuesday, July 26, 2011

TOO Cute Tuesday: Linky Par-Tay! #41

What a wonderful week we had with my parents, siblings,
and nieces and nephew.
It was a non-stop family party.
We missed having my husband there,
but we were only gone for a week this time,
so I think we all survived :)

My awesome "little" (he's like 6'4") brother built this
fire pit area in my parent's backyard.
We spent 3 of the 5 nights we were there enjoying it.


We made Reese's Peanut Butter Cup S'mores.
BEST. S'MORES. EVER.

And my Dad & brother made a YUMMY
Dutch Oven Peach Cobbler.

2 cans peach pie filling
1 yellow cake mix
12 oz Sprite
stick of butter

Pour peach pie filling intof in Dutch oven.
Layer the cake mix on top.
Pour Sprite on top of cake mix making sure that the cake mix.
Slice up a stick of butter and place evenly over the top.
Place 12 briquettes under and 12 on top of oven and cook for 45 minutes.

Now onto TOO Cute Tuesday!

What did you make this week that is TOO Cute??
Come link up!

Rules:
  • Must be made by you.
  • Link up to the specific post - not your main blog.
  • No Etsy shops or giveaways please :)
  • Please post the button or link back here so more people can join in the fun.
  • Visit some of the other participants and leave them some LOVE!
TOO Cute Tuesday will be open Tuesday-Friday.
On Saturday I'll highlight some of my favorites
and then we'll start over on Tuesday!


Ragamuffin Beauties Button

I changed the linky party so that the most recently uploaded project will show up as number one. This way everyone gets a chance on top. So, look in the first spot for your project, not at the end. Thanks!!!


Thursday, July 14, 2011

Fourth of July Dress and Jell-O . . . Finally!

I know I'm like a week and a half late,
but with company in town and getting ready for YW Camp
there just hasn't been time to post about it.


So I stewed and stewed about what
to make Isabella for the Fourth of July.
And wouldn't you guess, that I didn't decide
on what to make until the day before?
Awesomeness :)

I finally settled on the Elsie Dress pattern from Sew Sweet Patterns.
I love that pattern shop!
They also made the pattern that I used for THIS SKIRT.
However, I wanted to have some fun ruffles.
So I used the inspirations from Smashed Peas and Carrots
and added a ruffle down the front.


And don't forget the shoes and ruffle socks!


I also used my Rainbow Jell-O recipe
to make this Patriotic Red, White & Blue Jell-O for our Fourth of July BBQ.


I'm linking up HERE!!!


Friday, June 24, 2011

Summer Safari: Summer Recipes


I am so excited to be teaming up with
Heidi @ The Craft Monkey
and
Lauren @ The Elephant's Trunk
to host the Summer Safari Linky Par-tay!
Fun, huh?

I hope you joined Lauren for the Front Porch Party on Monday,
and Heidi for the Pennant Party on Wednesday.
If not, be sure you hop on over and link up!

Today is my day and I'm sharing with you a fun summer recipe!!!
Well, mine is more of a summer food, but I want you to link up
your awesome summer recipes at the end of this post.
I need some great summer salads, desserts, and apps!


Mmmm . . . . Woof 'Ems!!!!
These are a fun treat that the Armstrong clan likes to share around the
beach fire pit during summer nights.
My sister-in-law learned about them first and then
came home and said we had to try them.
I adore them.
Even better than a S'more.
True story.

You'll need:


* Refrigerator biscuits


*Pudding
I like to use already made pudding because it travels well,
doesn't need refrigeration, and is quick and easy.

*Whipped Cream
Optional.
Due to a traumatic experience in my childhood,
I am not a fan of whipping cream and don't keep it in the house :)

*Roasting Sticks

*Woof 'Em Pegs
I've seen them made on the end of a wooden broom stick handle,
but my father-in-law made these fancy pegs by cutting
up a wooden closet rod, round the corners with belt sander,
and drilling to little holes for the roasting sticks to slip into.


Fancy, huh?


STEP ONE
Take one refrigerator biscuit and flatten it out and shape
it around your woof 'em peg.
You don't want it too thick in any one spot so that you can
get it to cook all the way through and you don't end up with
a doughy, yucky woof 'em cup.


STEP TWO
Cook your woof 'em cup over an open flame.
Hey, I didn't have a fire pit readily available this week :)
That's why gas stoves rock.


It will puff up all nice and yummy.


STEP THREE
Slide your woof 'em cup off the peg.
BE CAREFUL - IT WILL BE TOASTY HOT.


STEP FOUR
Spoon your pudding of choice into the the woof 'em cup.
If you did mix your own pudding - it's wise to do it in ziploc bag.
Then you can snip of the end and squirt it right into your cup.


Now doesn't that look yummers???
If you're a food masochist you can add some whipped cream to the top. LOL


Now I bet you're wondering where the name Woof 'Em comes from.
Well, you make them and then you woof 'em down!


So much better than a S'more because you get
the sweet (pudding) with the savory (biscuit),
so the sweetness isn't overwhelming like the
marshmallow, chocolate, graham cracker combo of a S'more.

Speaking of S'mores, have you seen these??
Genius.


My sister sent me a picture this week and I had to find some!
And the kids will do about anything for a flat marshmallow.
Weirdos.

Also, another favorite summer recipe is Rainbow Jell-O!
I plan to make a red, white and blue version for the Fourth!


This post brought to you by:
Yuri's Design


Thursday, May 26, 2011

Tutorial Thursday: Balanalana Cookies {aka} Banana Cookies

So I made a batch of these yummies
on Sunday morning with the intention of saving some
to photograph and use as a recipe for today.

Well, my lesson on Sunday was about Heritage
and I decided to share my heritage of baking
that has been passed down from my Grandma.
So, I took the cookies to church to share with the
teens I teach -
thinking there would still be plenty to photograph.

Um, wrong!
They were gone!

So last night was Youth Group,
so I would again have a large group to share them with,
so I spent yesterday making a double batch to share.


They are so lovely and yummy!
My husband says it's like the cross between
the top of a muffin and banana bread.
(TOP OF THE MUFFIN TO YOU!)


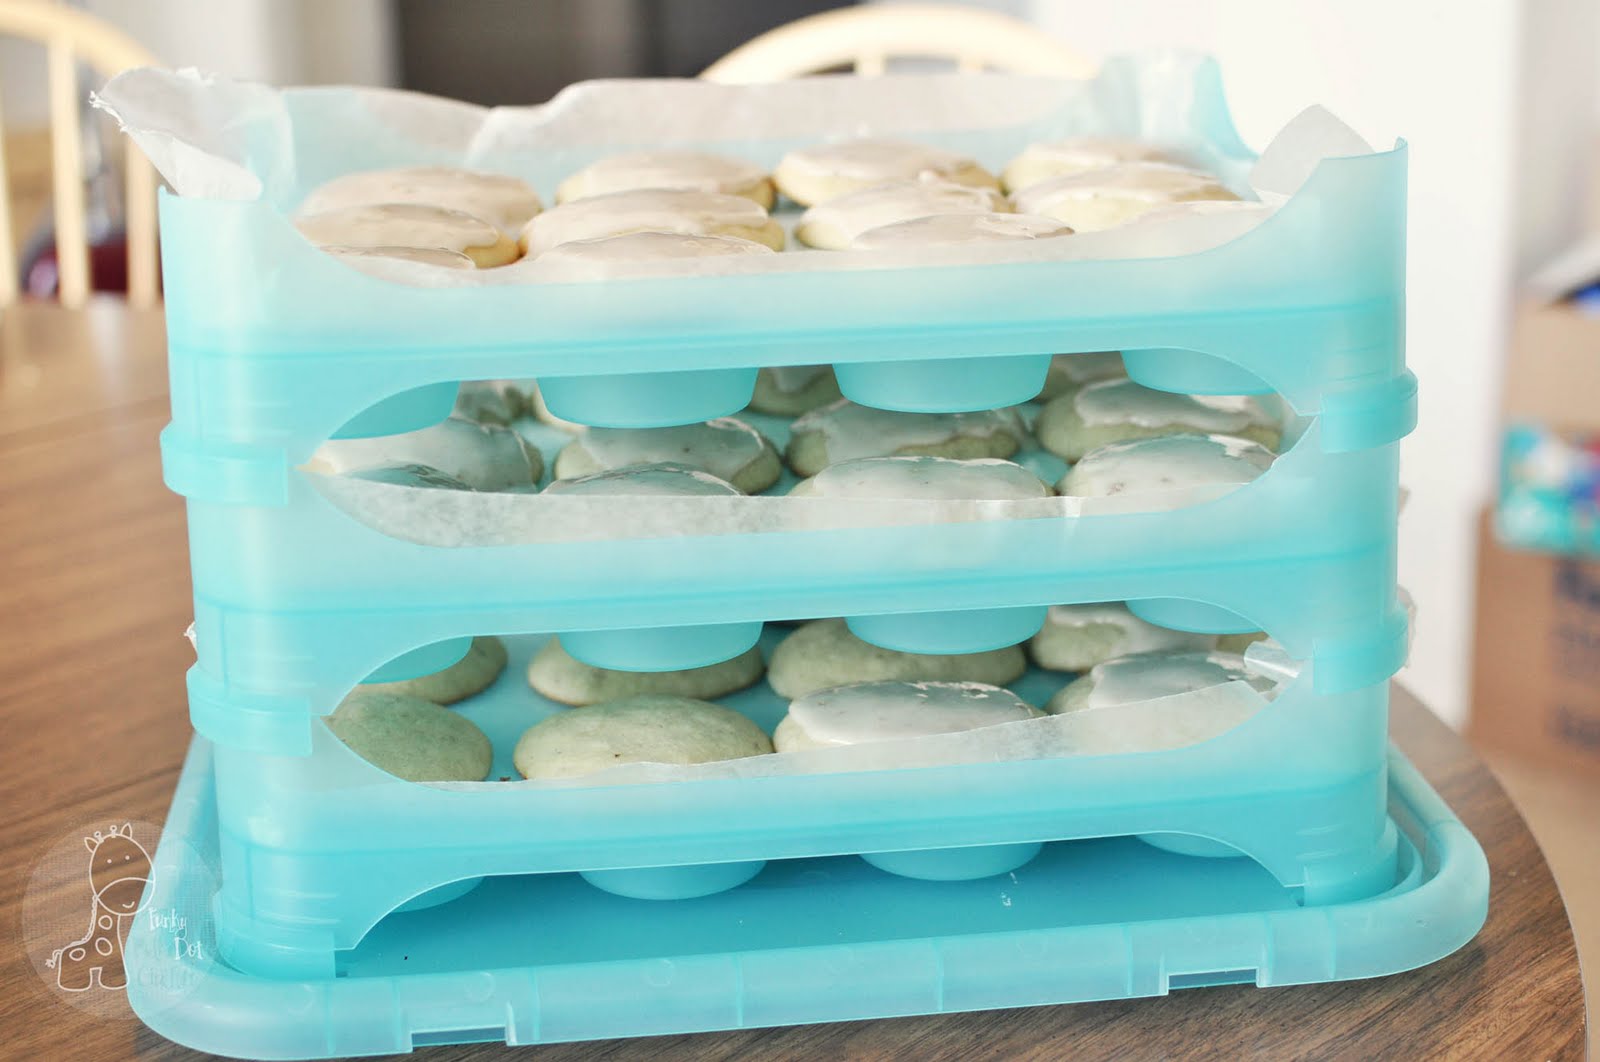
And have I told you how much I love my Cupcake Courier?
Mine came with cookie inserts that cover up
the cupcake holes so you can put cookies on the tiers.


I lined my tiers with wax paper, because once you glaze/frost
these little yummies, it can get kind of messy.


And now they are all boxed up and ready to go!


Banana Cookies
1 1/4 cup sugar
2/3 cup shortening
1 tsp vanilla
2 eggs
1 cup ripe to overripe bananas (about 2-3)
2 1/4 cup flour
1/2 tsp salt
2 tsp baking powder
1/4 tsp baking soda

Cream sugar, shortening and vanilla until light and fluffy.
Add eggs.
Stir in smashed bananas.
Add flour, baking powder, soda, and salt.

Bake 400 degrees for 9-10 minutes - until golden colored.

Banana Frosting
1 smashed ripe to overripe banana
1 cup sifted powder sugar
1 T milk
1 tsp vanilla

The glaze/frosting is really to taste.
You can add more banana or powdered sugar if it's too runny.
Plus, the frosting is optional.
My husband and my son like them plain.
Weirdos.

ENJOY!