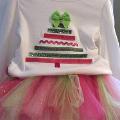
I'm slightly obsessed with making skirts for Isabella.
She loves them.
She likes dresses, but she {LOVES} skirts!
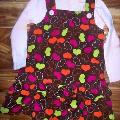
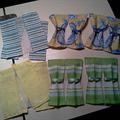
It all started with this skirt.

At Halloween, it was the tutu skirt
for her Little Red Riding Hood Costume.

Then I repurposed a pillowcase
dress I made for Isabella for her first trip
to Disneyland into this skirt
to match her the Minnie Cupcake shirt I made.

For Thanksgiving I made a skirt to match
her turkey face shirt.


And most recently I made a fabulous
little skirt for a cookie decorating party the
kids were invited to.


I just adore the pleats at the bottom,
so I decided to share with you how I made it,
in case you adore pleats like I do.

You'll need at least a 1/3 of a yard of your main fabric,
at least 15" of your contrasting fabric for the pleats,
and elastic to fit your little lady's waist.
Here is how I worked my math :) -
get ready for a wild ride into madness. LOL
I measured my little Isabella and I wanted my skirt to be 10" long.
However, I wanted my pleats to be about 2.5" long
and I need 1.75" for my waistband and work in .5" for
seam allowances.
10 - 2.5 = 7.5 + 1.75 = 9.25 + .5 = 9.75
I determined I that my main fabric piece
needed to be 9.75 inches long.
My waistband measurement comes from the fact
that my elastic is 1" wide, I roll it under .5"
first, and then 1.25" the second time to create
the casing. I roll it 1.25" the second time
so that I can topstitch the top seam too -
to keep the elastic from rolling.
First, cut your main fabric.
Using my measurements above, I cut 9.75"

When you open it up, you should have a long
piece that is 9.75" wide from selvage to selvage.

Next, you'll need to cut three 5" strips of your
contrasting fabric. Again, when you open them up
the will be 5" wide and run selvage to selvage.

Iron all of your pieces.
Then sew your pieces for pleating together
at the selvage ends, so you have one long strip that is 5" wide.
(Do not join the ends - you want a strip, not a tube.)

Now, go back to your iron and iron your pleat piece
in half - wrong sides together - so that it is now 2.5" wide.

Now it's time to make the marks for the pleat folds.
I decided I wanted my pleats 1.5", so every 1.5" inches
I made a mark with a Sharpie.
Continue marking the entire length of the fabric.

Starting at the right end of your strip, match
two marks together for each pleat. Pin pleat in place.

Continue pleating and pinning down the entire length of the fabric.

Run a basting stitch along the top edge of your pleats.

Pin the pleats to the right side bottom edge of your main fabric.

Sew the two together with with a seam allowance that is
just wider than where your basting stitch falls.

If you are fancy and have a serger, I recommend serging
the edge of this seam.
If you are not fancy like me and don't have a serger,
sew over the edge with a zigzag stitch to prevent fraying.
Flip your piece over and iron the seam.
Then topstitch.

Now it's time to join the selvage edges of your fabric,
creating a big fancy tube of fabric.

To create the casing for your waistband, fold and press the top
edge to the wrong side twice - first .5" and then just slightly larger
then the elastic you are using. I used 1" elastic
so I folded and pressed it about 1.25" the second time.
Now, topstitch both the bottom and top of the casing.
Leave about 2" open at the bottom of the casing to feed your elastic into.

I figure what length of elastic I need by just measuring
Isabella's waist. I don't add or subtract.
I know there are different methods for this.
I've been most successful by making the elastic the exact
same as her waist and then when I secure it
in the waist band, overlapping it about 1".
Feed your elastic through the casing by attaching a safety pin
to one end of the elastic and feeding it through the opening, all
the way around, and back out the opening.
Then, overlap the elastic about 1" and sew a rectangle on
the overlapping edges.
Push the remainder of the elastic back up in the
opening of the casing and finish the topstitching
to close off the casing.
VOILA!
You're done!


She loves them.
She likes dresses, but she {LOVES} skirts!
It all started with this skirt.

At Halloween, it was the tutu skirt
for her Little Red Riding Hood Costume.

Then I repurposed a pillowcase
dress I made for Isabella for her first trip
to Disneyland into this skirt
to match her the Minnie Cupcake shirt I made.

For Thanksgiving I made a skirt to match
her turkey face shirt.


And most recently I made a fabulous
little skirt for a cookie decorating party the
kids were invited to.


I just adore the pleats at the bottom,
so I decided to share with you how I made it,
in case you adore pleats like I do.

You'll need at least a 1/3 of a yard of your main fabric,
at least 15" of your contrasting fabric for the pleats,
and elastic to fit your little lady's waist.
Here is how I worked my math :) -
get ready for a wild ride into madness. LOL
I measured my little Isabella and I wanted my skirt to be 10" long.
However, I wanted my pleats to be about 2.5" long
and I need 1.75" for my waistband and work in .5" for
seam allowances.
10 - 2.5 = 7.5 + 1.75 = 9.25 + .5 = 9.75
I determined I that my main fabric piece
needed to be 9.75 inches long.
My waistband measurement comes from the fact
that my elastic is 1" wide, I roll it under .5"
first, and then 1.25" the second time to create
the casing. I roll it 1.25" the second time
so that I can topstitch the top seam too -
to keep the elastic from rolling.
First, cut your main fabric.
Using my measurements above, I cut 9.75"

When you open it up, you should have a long
piece that is 9.75" wide from selvage to selvage.

Next, you'll need to cut three 5" strips of your
contrasting fabric. Again, when you open them up
the will be 5" wide and run selvage to selvage.

Iron all of your pieces.
Then sew your pieces for pleating together
at the selvage ends, so you have one long strip that is 5" wide.
(Do not join the ends - you want a strip, not a tube.)

Now, go back to your iron and iron your pleat piece
in half - wrong sides together - so that it is now 2.5" wide.

Now it's time to make the marks for the pleat folds.
I decided I wanted my pleats 1.5", so every 1.5" inches
I made a mark with a Sharpie.
Continue marking the entire length of the fabric.

Starting at the right end of your strip, match
two marks together for each pleat. Pin pleat in place.

Continue pleating and pinning down the entire length of the fabric.

Run a basting stitch along the top edge of your pleats.

Pin the pleats to the right side bottom edge of your main fabric.

Sew the two together with with a seam allowance that is
just wider than where your basting stitch falls.

If you are fancy and have a serger, I recommend serging
the edge of this seam.
If you are not fancy like me and don't have a serger,
sew over the edge with a zigzag stitch to prevent fraying.
Flip your piece over and iron the seam.
Then topstitch.

Now it's time to join the selvage edges of your fabric,
creating a big fancy tube of fabric.

To create the casing for your waistband, fold and press the top
edge to the wrong side twice - first .5" and then just slightly larger
then the elastic you are using. I used 1" elastic
so I folded and pressed it about 1.25" the second time.
Now, topstitch both the bottom and top of the casing.
Leave about 2" open at the bottom of the casing to feed your elastic into.

I figure what length of elastic I need by just measuring
Isabella's waist. I don't add or subtract.
I know there are different methods for this.
I've been most successful by making the elastic the exact
same as her waist and then when I secure it
in the waist band, overlapping it about 1".
Feed your elastic through the casing by attaching a safety pin
to one end of the elastic and feeding it through the opening, all
the way around, and back out the opening.
Then, overlap the elastic about 1" and sew a rectangle on
the overlapping edges.
Push the remainder of the elastic back up in the
opening of the casing and finish the topstitching
to close off the casing.
VOILA!
You're done!


